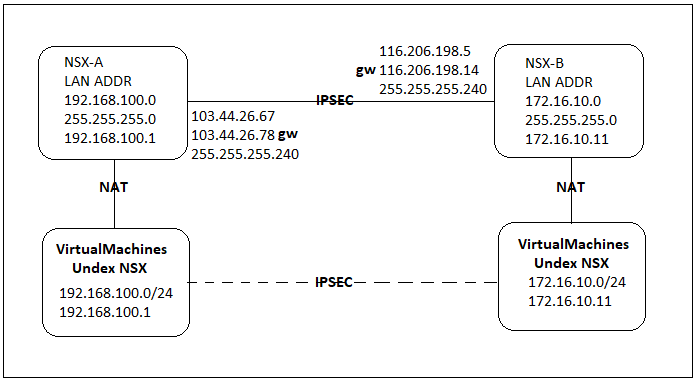
Lab Topology
Work Steps
- Make sure NSX Edge working properly.
- Make sure VirtualMachines can connect to each NSX Edge.
- Make sure network on VirtualMachines is configured properly.
- Make sure NAT for VirtualMachines is working properly.
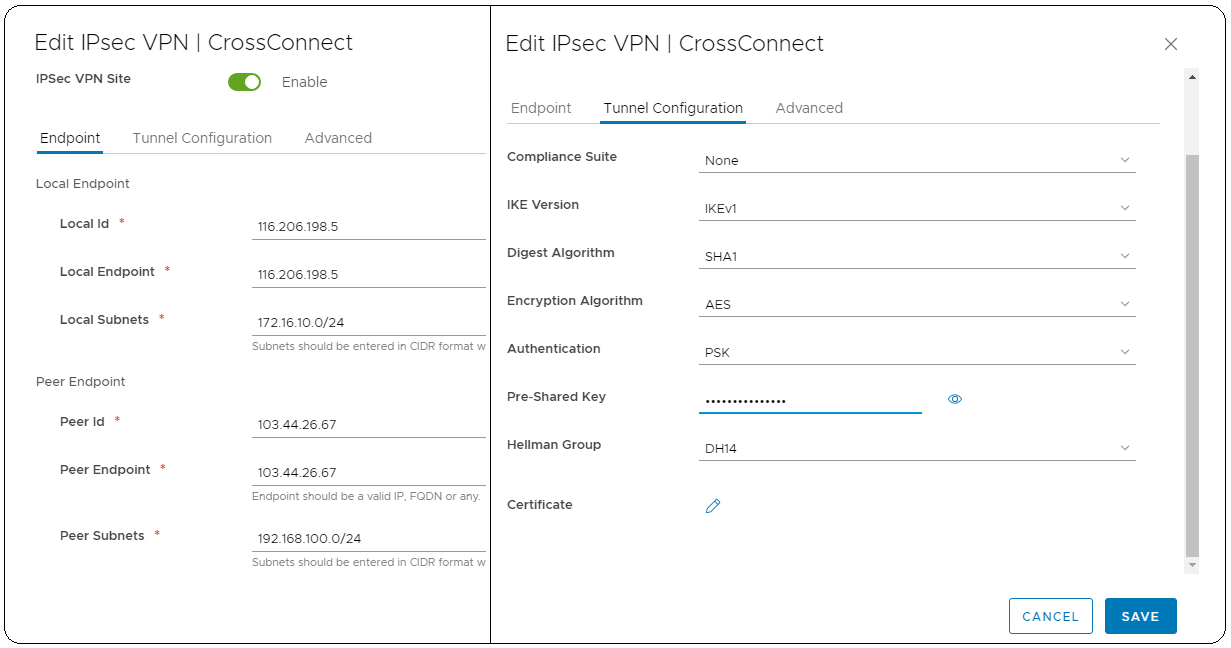
Configure NSX Edge-A
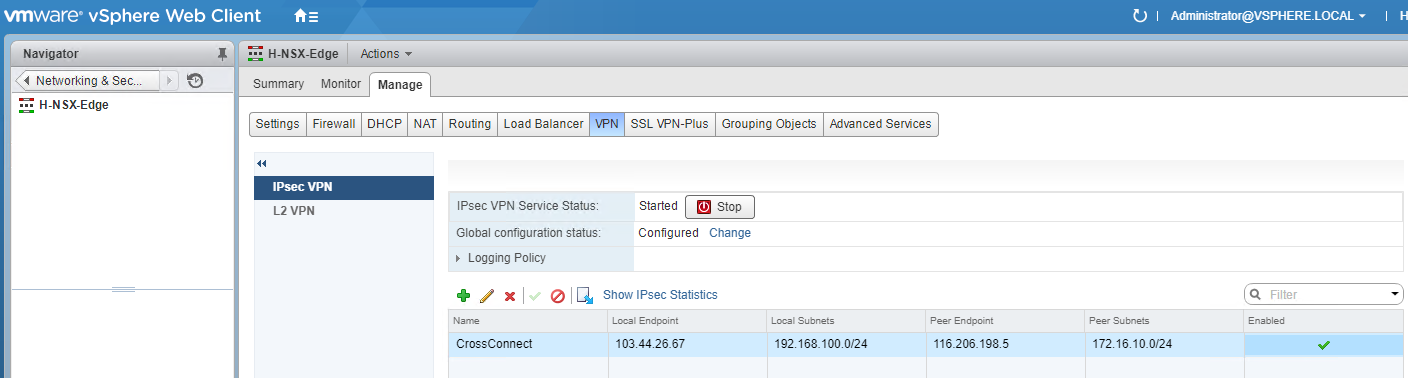
- Login to vSphere web client > Networking & Security
- Choose NSX Edges > Your Edge > VPN > IPsec VPN
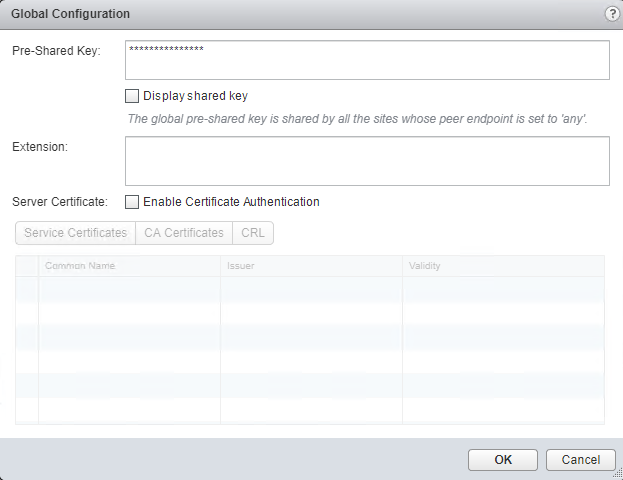
- Configure pre-shared key in global configuration status
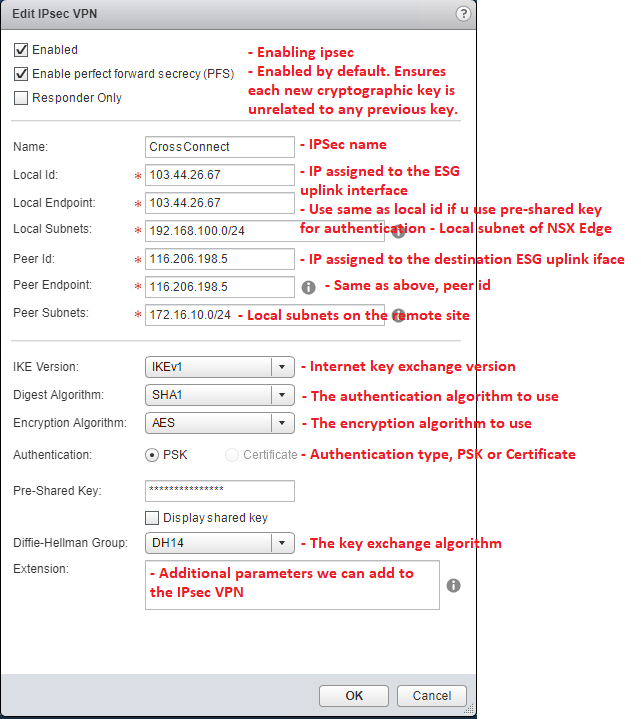
- Choose add new IPsec (green icon)
- Start IPsec Services.
Configure NSX Edge-B
- Login to vSphere web client > Networking & Security
- Choose NSX Edges > Your Edge > VPN > IPsec VPN
- Configure pre-shared key in global configuration status
- Choose add new IPsec (green icon).
- Start IPsec Services.
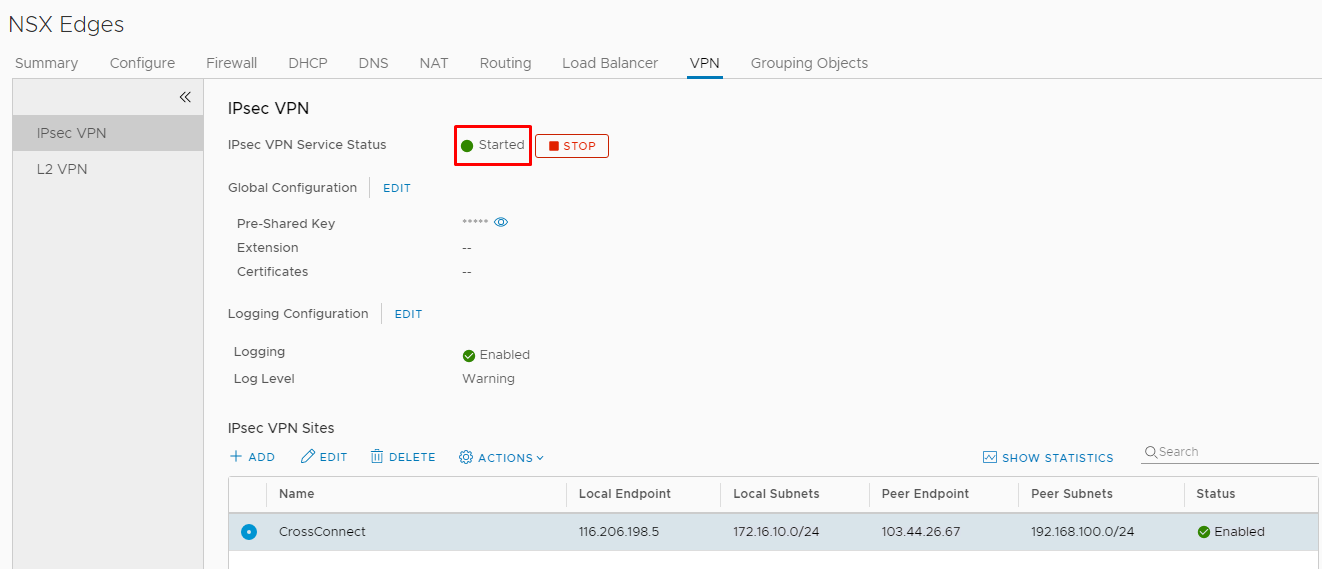
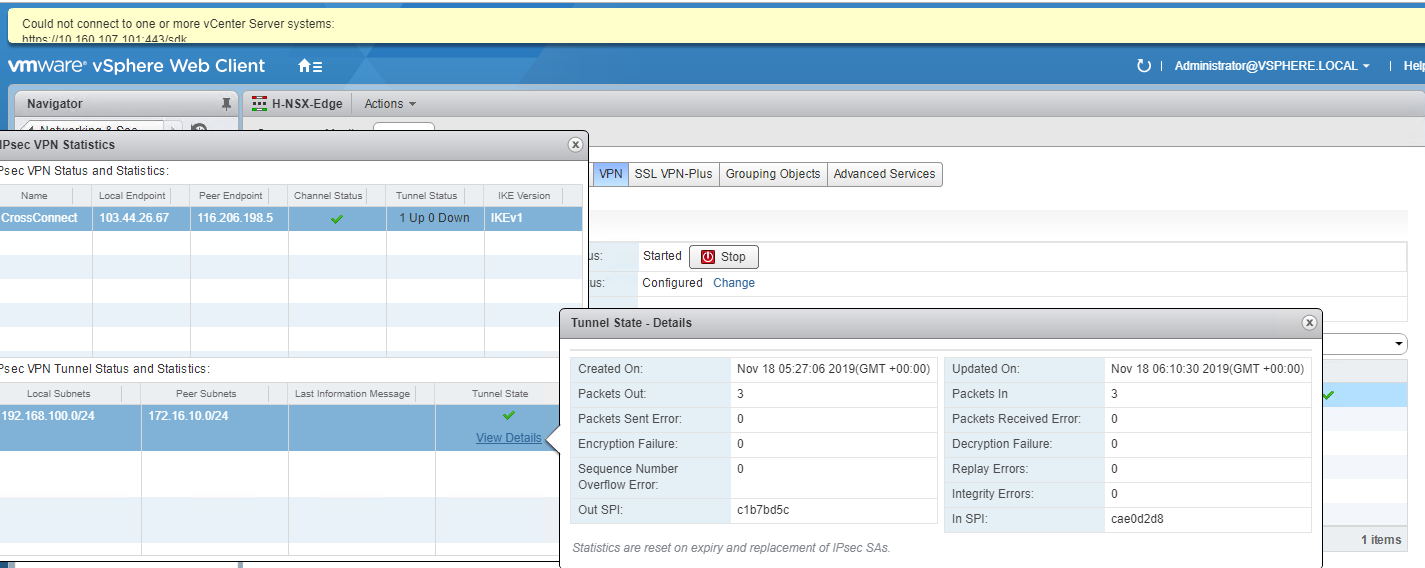
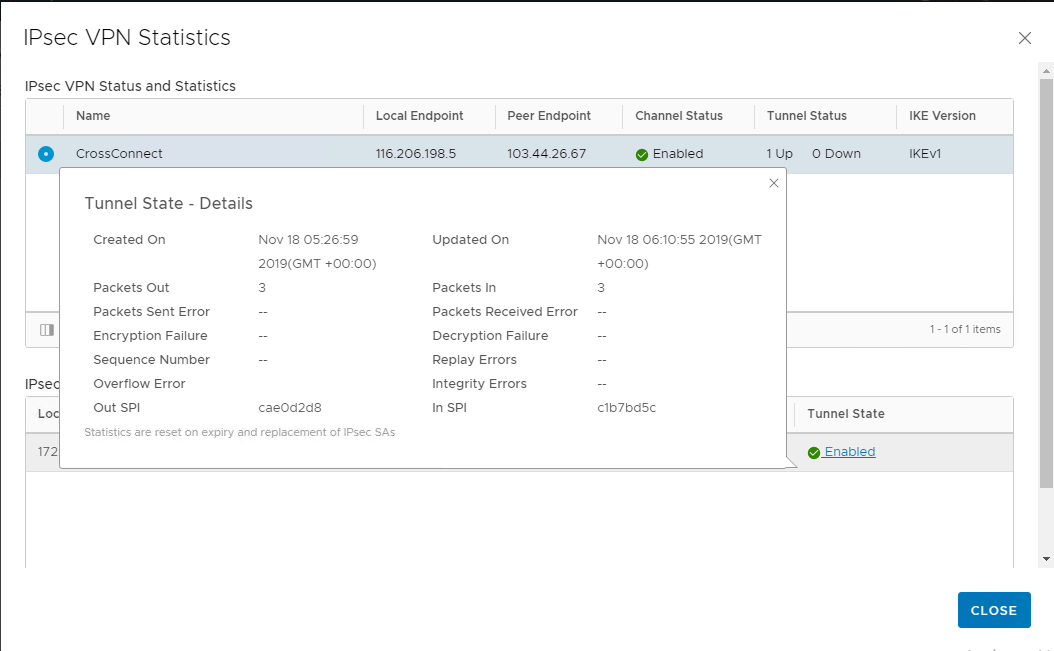
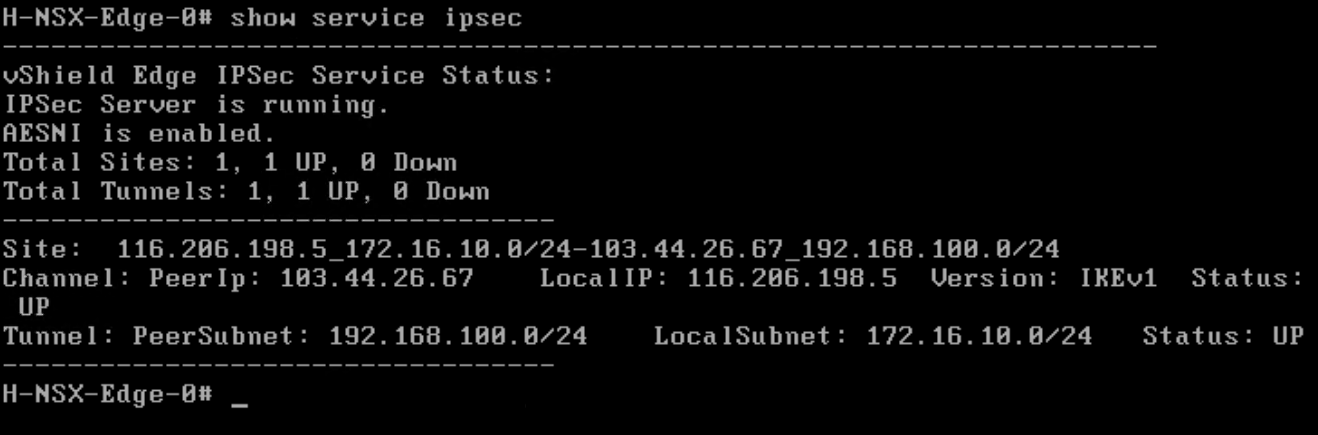
IPSec Verification
- Make sure ipsec is established/up in SHOW STATISTIC.
Client Testing
- Ping from VM under NSX-A.
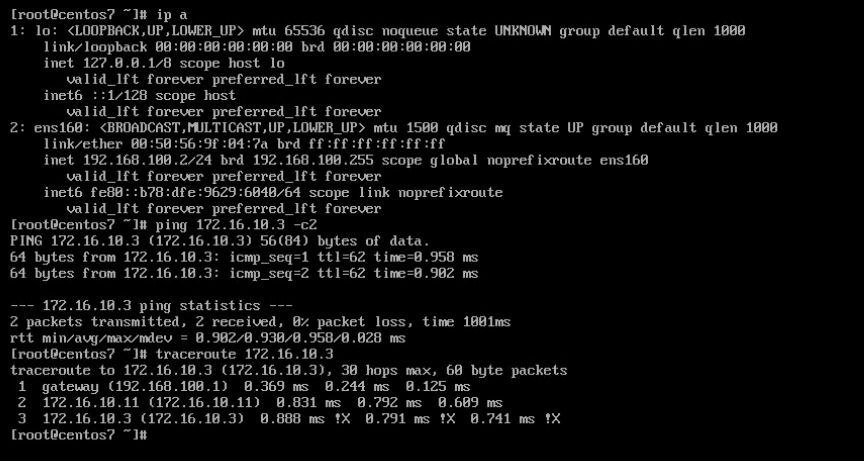
- Ping from VM under NSX-B.
